Shave a Chocolate Bar for an Easy, Elegant Decoration
Sometimes the simplest decorations make the most beautiful desserts. The naked cake really leans into a minimal attempt at frosting, and you can get away with decoratively sticking candy bars into your dessert. Here’s another decoration to add to your minimalist repertoire. It’s elegant, extremely versatile, and requires nothing more than a vegetable peeler. Shave a chocolate bar to make chocolate curls and shavings.
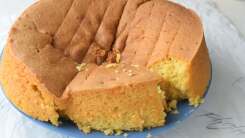
Using this method for decoration is as easy as powdered sugar, but with far more flavor, and a bit more drama. Plus, you can always hit it with a dusting of sugar afterward. Shavings are smaller than curls, but they’re both made in the same manner. Decide what sort of shape you want first. If you’re making small desserts, like cupcakes or individual mousses, shavings might be a better fit. If you’re decorating a spoon cake, a more pronounced curl is in order. The size of the curl is dictated by the temperature of your chocolate.
Grab any plain chocolate bar (dark, milk, or white chocolate), and a sharp vegetable peeler. (Chocolate bars with nuts, fruits, or other inclusions will interrupt the shape.) Run the peeler blade along the edge of the chocolate bar, and angle it flat against the back of the bar to get a wider shape. Always shave directly over the dessert, or onto a cold plate so the chocolate pieces don’t melt together.

Chocolate has a fair amount of cocoa butter in it, a saturated fat. That fat gets brittle in cold temperatures, and flexible in warm temperatures. For small shavings use a cold, or room temperature up to 70°F, chocolate bar. The pieces will be finer, and break more frequently due to the chilled fats. For medium shavings, or small, tight curls, warm up the shaving-edge of the bar briefly with a gentle, outside heating source. I’ll snap on a stovetop burner and wave the chocolate over the source, or if my oven is on, I’ll open the door and hold the chocolate in its warmth for a few seconds. It only takes a moment; you don’t want the chocolate to begin melting. For thick, bold curls, warm the chocolate in the microwave for about 10 seconds for thick bars, and five if you’re working with thin bars. The microwave will heat the chocolate gently but from the inside out, which means you can shave deeper into the chocolate and achieve a thicker curl without it breaking.
These thin little ribbons and wisps melt readily, so make sure the dessert you’re decorating is completely cool, even cold, before decorating. You can also make a bowl of chocolate curls ahead of time and keep them in the refrigerator until needed. Sprinkle as a decoration onto cakes, puddings, custards, or ice creams using a cold spoon or (quickly) with your fingertips.
RECOMMENDED NEWS
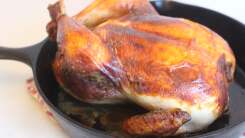
How to Roast a Whole Chicken Without Messing It Up
There is something quite homey and family-oriented about the site of a whole roasted chicken. It mak...
The Best Pumpkin Spice Item Is the Scone, You Fools
Fall is here, which means a deluge of questionable pumpkin spice items, along with some dubious opin...
Your Onion Dip Needs at Least Five Onions
The smell of caramelizing onions is one of the most heavenly aromas one can sniff, and it’s one of t...

Frozen Prunes Are Amazing, Actually
Prunes are mistreated. We don’t treat other dried fruits with nearly the same kind of blatant disres...
Not All Cloud Bread Is Created Equal
I had mixed feelings after perusing different pictures and recipes for cloud bread, a food that has ...
Your Marinara Needs Onions or Garlic, but Not Both
A few years ago, I read somewhere that Italians never use onions and garlic in their marinara; it’s ...
Comments on "Shave a Chocolate Bar for an Easy, Elegant Decoration" :