Chrome is easily the most popular web browser on the planet. According to Statcounter’s desktop browser market share survey, Chrome takes home a whopping 65% of the market in desktop browsers as of late 2017.
With that sort of market-defining power, designing for Chrome has become a priority. The same goes for extensions: Chrome offers the largest user base for extensions by far, with tens of thousands of extensions, themes and apps populating the Chrome Web Store.
If you want to cash in on the trend, you can build your own basic Chrome extension. You’ll just need some basic web development skills (HTML, CSS and Javascript) as well as a teaspoonful of JSON to tie it all together.
We’ll be reviewing the most basic structure required to build a basic Chrome extension in this post. To get an in-depth view of the possibilities available, check out Chrome’s Developer Extension Guide.
Writing a Basic Chrome Extension: Manifest Destiny
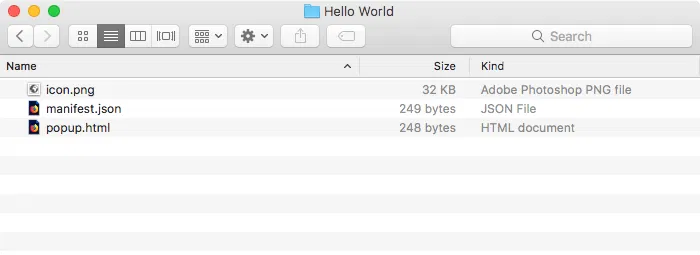
For this tutorial we will build a basic Chrome extension that displays a simple popup message when clicked. We’ll need a couple of important files: an icon (“icon.png”), an HTML file (“popup.html”) and the all-important manifest (“manifest.json”). All these files will live inside of a directory with the name of your extension. In this case that’s called “Hello World.”

A Chrome extension is defined by its manifest. This snippet of JSON shows Chrome how to interpret the extension, what files to load, and how to interact with the user.
The manifest file for our very basic extension looks like this:
{
    "manifest_version": 2,

    "name": "Hello World!",
    "description": "My first Chrome extension.",
    "browser_action": {
        "default_icon": "icon.png",
        "default_popup": "popup.html"
    },
    "permissions": [
        "activeTab"
     ]
}
This manifest file will put an icon in the user’s toolbar that, when clicked, loads the contents of the file named “popup.html.” The following is the nitty-gritty on the rest of the contents:
manifest_versiontells Chrome what version of the manifest markup you’re working with. For modern extensions, you’ll need to set this to2.namedisplays the name the extension will show in Chrome store and “chrome://extensions.”descriptionshows the descriptive text displayed on “chrome://extensions.”browser actionloads the icon into the toolbar. It also allows the extension to respond to user input by displaying a tooltip, popup or badge. Check out a full list of everything “browser_action” can do.default_iconshows the path to the icon from the extension’s directory.default_popupshows the path to the file that will load when the extension’s icon is clicked.permissionslimits the extension’s functional region.activeTabis the most common, allowing the extension to access the front-most tab. Google provides a list of all the permissions an extension can request.
If you want a deep dive into everything that a Chrome extension’s manifest can declare, check out Google’s docs on extension manifests.
Writing a Basic Chrome Extension: Popups
Now that we’ve written our manifest, we can figure out what our extension will display. That’s up to our “popup.html” file, which will display when the extension loads. Here’s what we’ll be using for this project:
<!doctype html>
<html>
    <head>
        <title>Hello World</title>
    </head>
    <style type="text/css">
        body {
            margin: 5px;
        }
        h1 {
            font-size: 15px;
            text-align: center;
        }
    </style>
    <body>
        <h1>Hello World!</h1>
    </body>
</html>
As you can see, this will render some text styled with CSS. If you want to add Javascript or external CSS to your extension, that requires declaring the scripts in the manifest, under the content_scripts key. Once you have that referenced in the manifest, you can load those scripts as you normally would.
Writing a Basic Chrome Extension: Loading into Chrome
Once we’ve written the basic code for our extension and found a suitable icon, we can load it into Chrome.
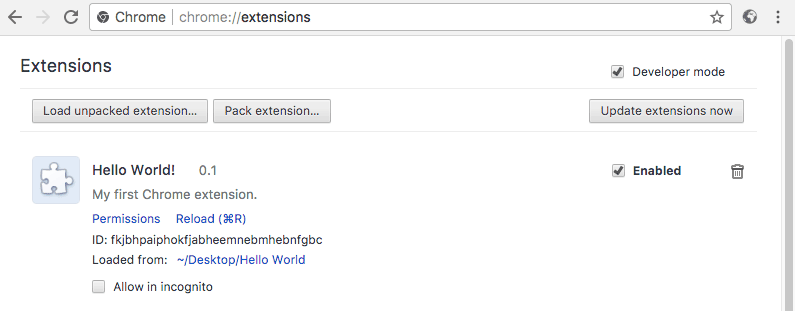
1. Navigate to “chrome://extensions” and turn on “Developer Mode” by ticking the checkbox in the upper-right.

2. Click the “Load unpacked extension…” button and select the extension’s directory.

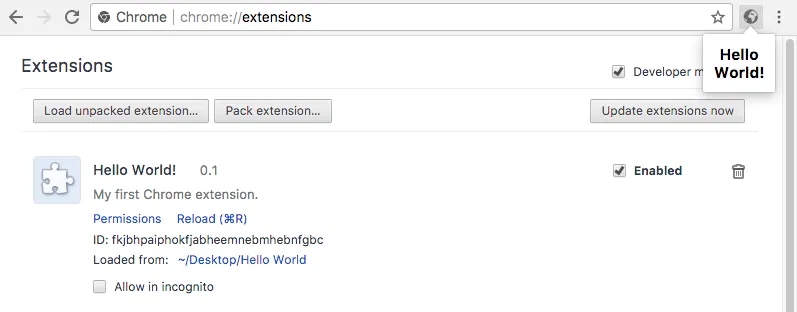
3. Once the extension is loaded, you’ll see its icon in the menu bar.

4. Click on the extension to see its (very simple) effect.

Conclusion: Expanding Your Chrome Extension
Once you’re finished with your extension and are ready to publish, you’ll need to create a Chrome developer account. That’s not an exactly straightforward process, but Google provides complete instructions for publishing your Chrome extension here.
There is obviously so much more you can do with your Chrome extension, but that’s somewhat beyond the scope of this post. If you want to learn more about everything Chrome extensions can do, check out Google’s Chrome Developer Extension Guide.


Comments on " How to Write and Create a Basic Chrome Extension" :